Tuesday, 9 December 2014

3D Sleigh
Assembly Instructions


Components are
2 x side of sleigh
2 x sleigh runners
2 x decoration for top of sleigh sides
1 x main section of the sleigh 

I would recommend using very tacky double sided tape for sticking the sides to the main section, it can get a bit messy with glue.

So stick one of the sides to the main section starting from the back of the sleigh, taking care to keep the curves neat. Then attach the other side
 
Now glue on the decoration on the top edge of the sleigh

For the runners I actually cut 4 and glued 2 together for strength 
Attach the runners along the bottom lining them up with the bottom of the sleigh

Make sure you keep the runners level otherwise you'll have a rocking sleigh lol


Monday, 8 December 2014


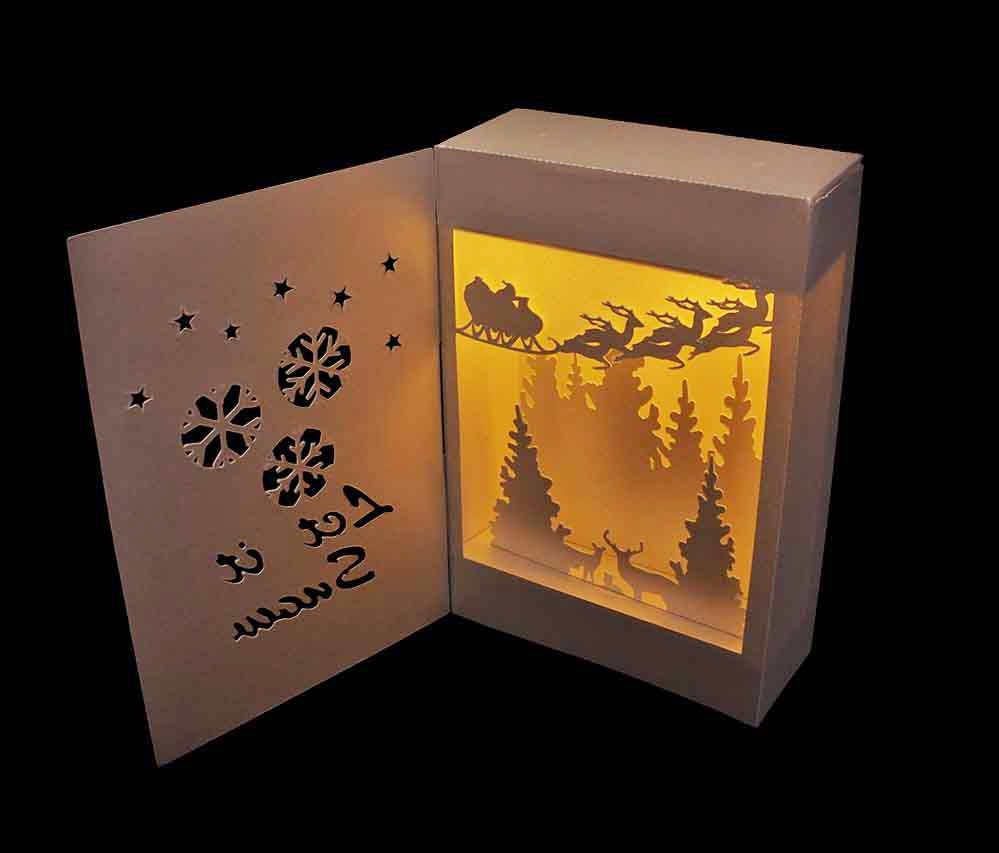
Shadow Box Lantern
Assembly Instruction

More shadow box lanterns available here


Components are
1 x back box section, 1 x front box section 1 x front cover 1 x bottom insert for layers to sit on 1 x top insert for candles to sit in 1 x vellum to back santa and his sleigh 2 x hinges 1 x lock  and the layers some have 1 some may have several


Cut all your components out

The main box is made up of only 2 sections there’s a gluing strip for these to attach together.

First of all glue the vellum in place on the back of Santa’s Sleigh.
Now fold all the scoring lines and then glue the main box together

Glue the layer(s) onto the bottom insert this is an oblong with 4 glue tabs on each side (there’s another one with 5 holes in this is for the top of the box)


When the glue is dry with the layers you can now glue this part into place. The tabs need to fold downwards.
Line the flat base with the payers on it with the bottom of the window.

The next bit is a little fiddly..

The top insert can now be glued in place, the tabs for this need to fold upwards

Slide in into place so that the flat part with the holes in line up with the top of the window.
The holes are for you to put a tealight (upside down) inside. There are several holes to give you a choice of how many candles you want and the positioning of them (I used only 1 on the left hand side to give the effect of the moon)


Now the front cover.
Glue the hinges onto the left side of the front cover spacing them evenly and then the lock on the right side about in the middle


Once the glue has dried, glue the hinges onto the left side of the box.
Place your candle in to top close the lid and you have the most beautiful Shadow Box Lantern


Wednesday, 26 November 2014

Magical Castle, Festive Fair and Nativity 2
Pop up layered scene cards or decorations
You can purchase these HERE


Tuesday, 25 November 2014

Winter Cottage & Christmas Carols
Pop up card scenes


Assembly Instructions 
First of all cut all your components in your choice of card.
The main base has only a fold in the middle, The base for the layers to be attached to has a fold line and 3 or4 angled cut lines depending on the design, these cut lines are for you to slide the layers into and glue them from underneath making a nice neat top on your design, cut this part in thin card or paper

If there's velum to be glued to buildings do this now. 


Now, Glue your front layer into place,each layer has 2 long tabs, fold the first layer backwards and the rest of layers fold forwards, this will keep it all neat on the base when you come to glue it on the main base, now work back from there with each layer securing them neatly with glue or tape

Now attach your top base layer to the main base layer. Keep it all flat and glue in place, let it all dry before you try and fold it. 
Now it's time to put any silhouette parts in place, they just glue to the front of the second fence layer, you can put in in any position you prefer or you can copy the one I did on the image.
 To purchase these or other designs click HERE

Thursday, 20 November 2014

Beautful Nativity Scene
Pop up Layered Card
Available to purchase In our shop


Monday, 17 November 2014

Winter Wonderland
Pop up layered scene card


Available to purchase HERE


Christmas lane

Available to Purchase HERE

Thursday, 13 November 2014

Pop up layered scene cards
A couple of new designs 
You can purchase them Here

All the fun of the Fair


Festive Lane