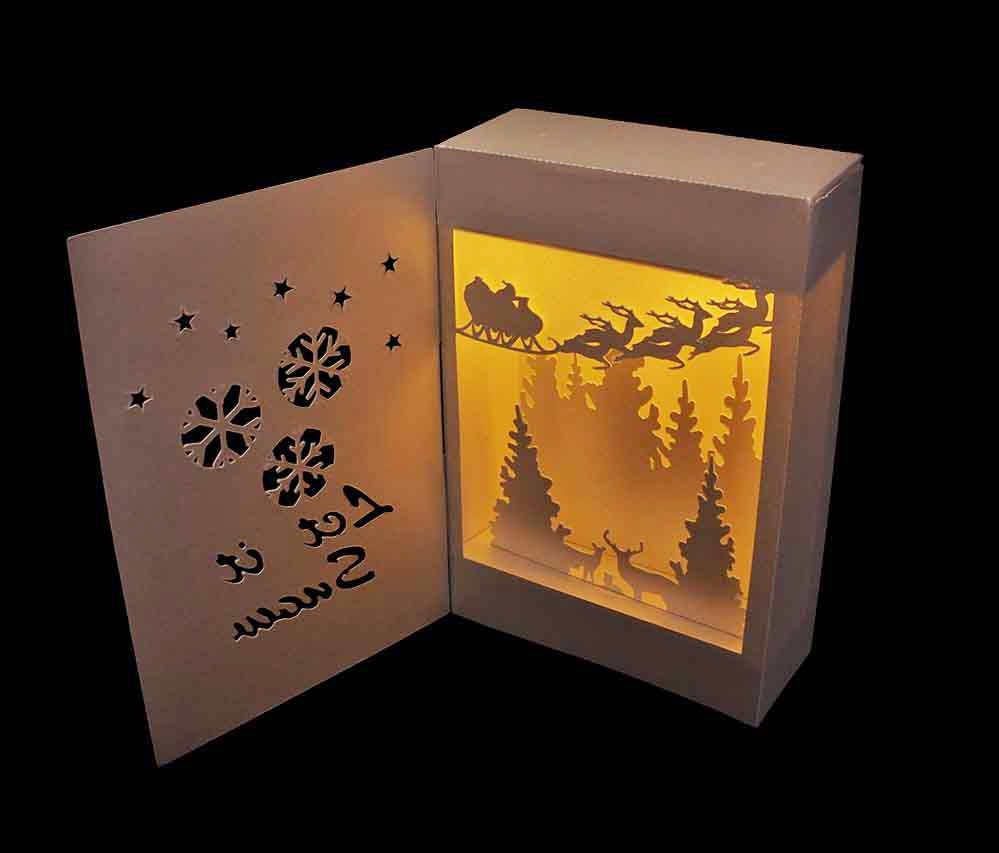
Shadow Box Lantern
Assembly Instruction
More shadow box lanterns available here


Components are
1 x back box section,
1 x front box section 1 x front cover 1 x bottom insert for layers to sit on 1
x top insert for candles to sit in 1 x vellum to back santa and his sleigh 2 x
hinges 1 x lock and the layers some
have 1 some may have several


Cut all your
components out
The main box is made
up of only 2 sections there’s a gluing strip for these to attach together.
First of all glue the
vellum in place on the back of Santa’s Sleigh.
Now fold all the
scoring lines and then glue the main box together
Glue the layer(s)
onto the bottom insert this is an oblong with 4 glue tabs on each side (there’s
another one with 5 holes in this is for the top of the box)


When the glue is dry
with the layers you can now glue this part into place. The tabs need to fold
downwards.
Line the flat base
with the payers on it with the bottom of the window.
The next bit is a
little fiddly..
The top insert can
now be glued in place, the tabs for this need to fold upwards
Slide in into place
so that the flat part with the holes in line up with the top of the window.
The holes are for you
to put a tealight (upside down) inside. There are several holes to give you a
choice of how many candles you want and the positioning of them (I used only 1
on the left hand side to give the effect of the moon)

Now the front cover.
Glue the hinges onto
the left side of the front cover spacing them evenly and then the lock on the
right side about in the middle


Once the glue has
dried, glue the hinges onto the left side of the box.
Place your candle in
to top close the lid and you have the most beautiful Shadow Box Lantern


No comments:
Post a Comment