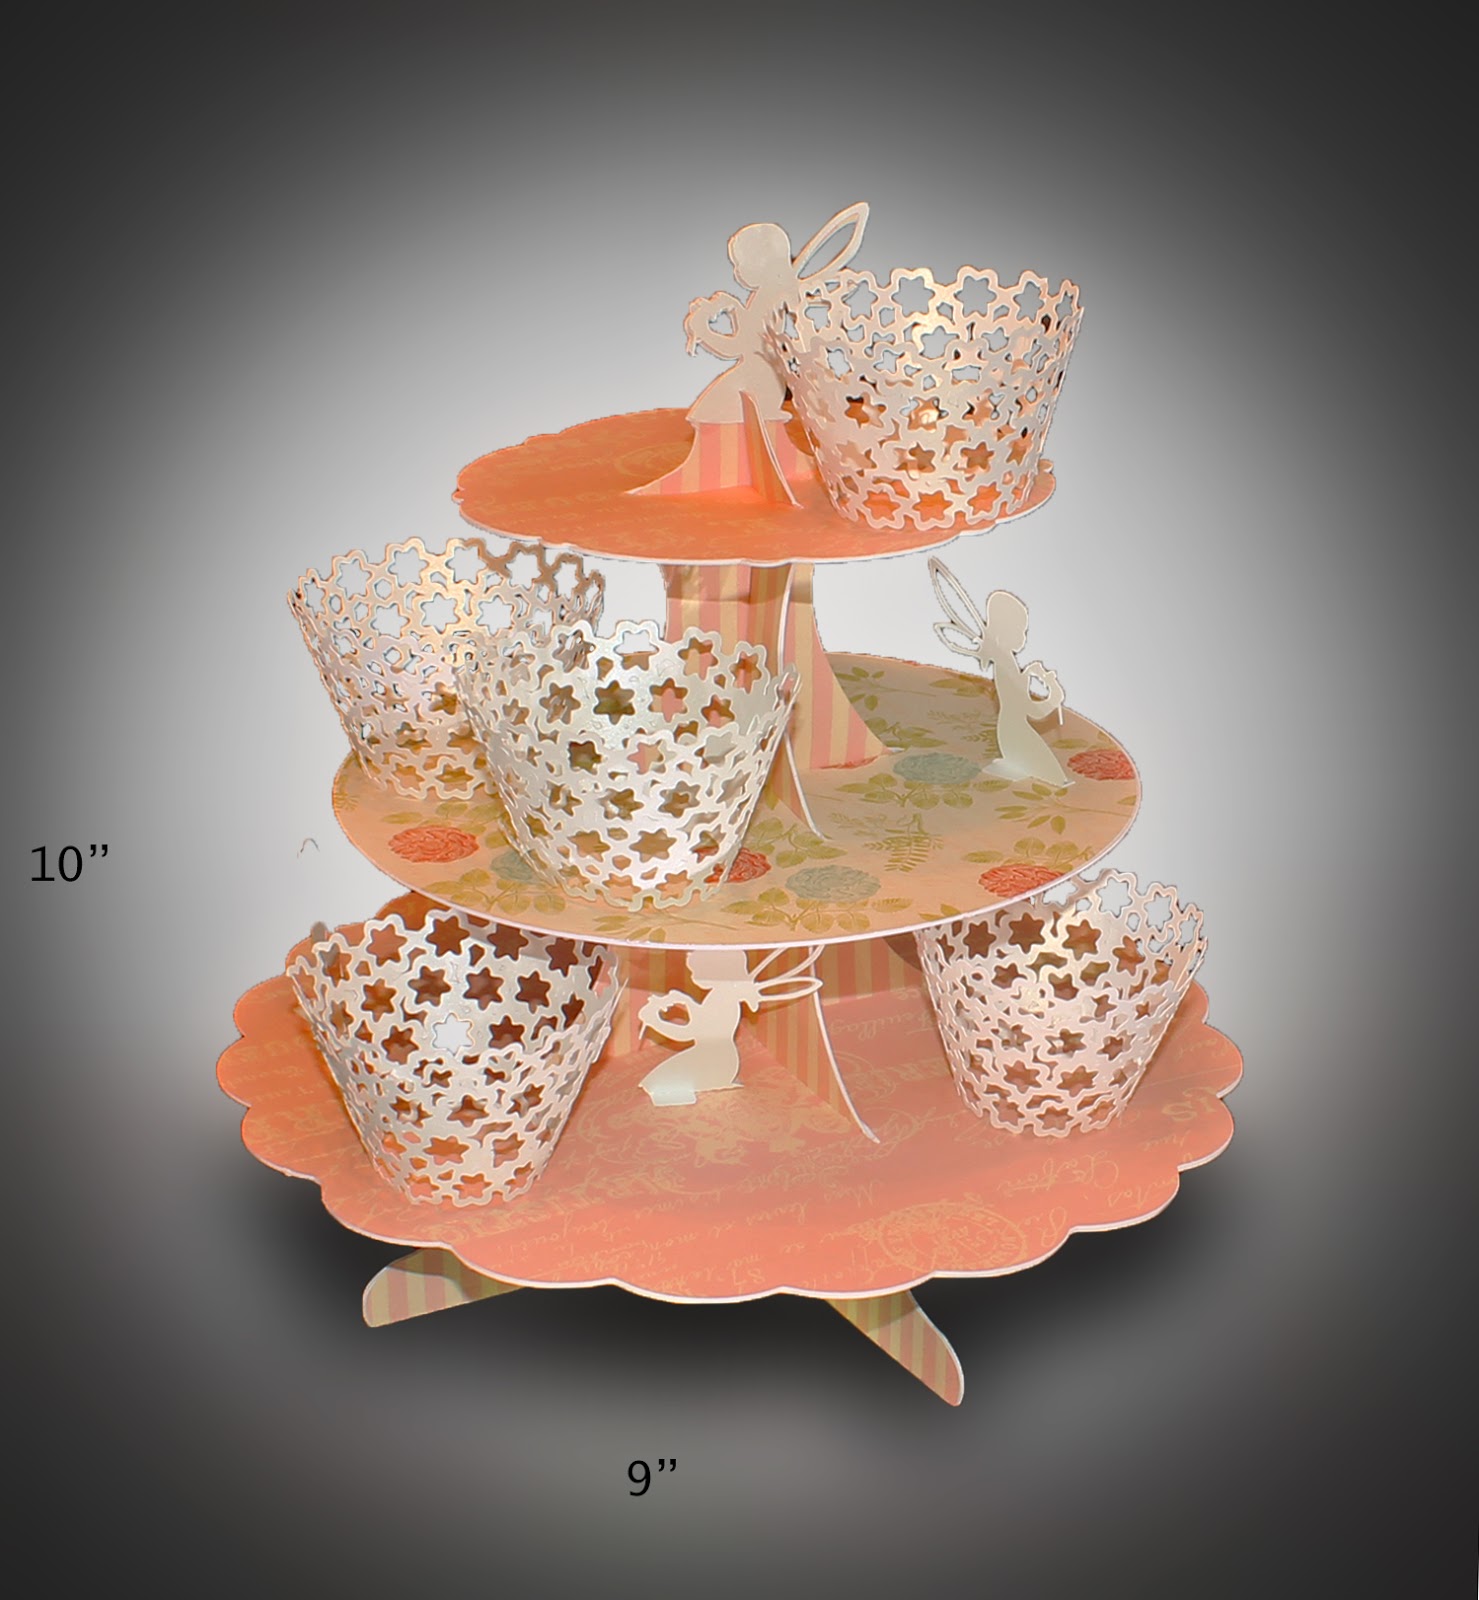
Cupcake Stand
Assembly instructions
Purchase this file here

A fun design to add to your table decorations at a party or afternoon tea etc
The image below is what you see on your digital mat

Cut 2 of both stand sections and 2 of each tier
Glue the 2 stand pieces together for strength for both sections and the same with each tier - again for strength
Then cut out 2 more of the stand sections in your chosen decorative paper remember to flip the second one that you cut out so that it's the opposite way otherwise you will ahev one the wrong way round when you come to glue it in place.
Now you have the decorative paper glue them to the stand sections you have already made. glue one on each side so that it is now covered on both sides with your decorative paper.
Now cut 1 for each of the tiers from decorative paper and glue this to the top of each of your tiers
You will see that your stands have a cut out secion, one has one from the top and the other one from the bottom. they slot over each other to make a cross for the tiers to fit over.
Slot the stand together (make sure your glue is dry before doing this)
One you have made the stand you can now slot the tiers over the top starting with the large (bottom) tier first then the middle then the top. each one has a little ledge to sit on so that they always sit in the same place.
Cut out the fairies and arrange them on each tier where ever you want to put them. then cut out the cupcake wrapper for your cakes and arrange them around each tier to show them off :)
The stand is 10" high x 9 " wide (approx) this can be re sized to suit your paper limits or your requirements
I cut mine out of 12" x 12"
The card used for my stand was 180gsm and the decorative paper was from Dovecraft Sweet Paris. The cardstock used for the cupcake cases is 150gsm pearlescent
No comments:
Post a Comment