Thursday, 25 June 2015

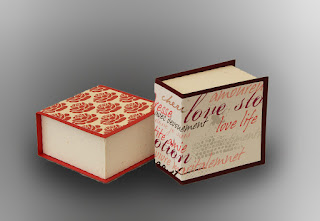
Heart Lattice Box card
Assembly instructions

Purchase this file Here


A simple but elegant lattice box card

It's easy to make
Add the decorative panels before making the box up
Fold the main box and glue the edges together with the glue tab

There are 4 separate layers but you don't have to use all 4, they're all different sizes largest to the back shortest to the front
They simply attach to the inner sides of the box with the glue tabs (fold them backwards)

Glue the layers in place and then add the decoration. 
Included in the file is some butterflies and some flourishes but you can add your own as can be seen in the images below from a Customer Cher.


Enchanted Fairy Box card
Assembly instructions

Purchase this file HERE


Below is an image of the same as you will see on your digital mat, but your will not have the text


Cut all your pieces

Add the decorative panels to the main box before you make the box up.
Now make the box up.
The cross section insert is as it says
Pass the orange section through the pink section, the flower arch will slot at the highest point, there isn't an actual slot but the way I've designed it, it just fits nicely together at the top and will fold flat neatly too.

Now you have them crossed through each other, fold the glue tabs all the same way,
dab some glue on the tabs and carefully position each tab in the middle
of each side in the main box as shown in both images below

be sure they're positioned in the middle so that the box will fold flat with any problems. 
before the glue is completely dry fold it flat and press down to make sure the cross section is in the right place, then fold it flat the other way too. 

The 2 back corners do not fold down they create a back drop for the fairy


Tuesday, 23 June 2015

Teapot, Cup and saucer
 Assembly Instructions
Purchase this design HERE


The image below is what you will see on your digital mat (without the text)
 Teapot (scroll down for cup and saucer)
 
 Cut all your pieces

Assemble the spout, the shorter peice with tabs is the upper section of the spout and the longer one is the underneath, then the 2 sides, glue these together to make the spout

Take the sides of the teapot and put a curve in them to make them easier to glue to each other then one at a time glue them together starting at the bottom. I put the glue tabs on the outside so which is much easier and the decorative panels hide the tabs anyway.

Do this until you have all 6 sides glued together. 
Now glue in the base. keeping all the 6 side edges to the 6 sides of the base.

Glue the decorative panels on 

Glue the 2 parts of the handle together and then add the decorative panes to this and the spout then add then to the teapot.


The cup is pretty much the same assembly as the teapot but with 8 sides. so follow those instruction again for the cup.

And the saucer is almost the same again
the 12 sides to the saucer all glue together and then the base is added after, one on the top and one underneath to hide the glue tabs, then add the decorative layer on the top


Ornate Birdcage
Assembly Instructions

Purchase this design HERE


Below is an image of what your digital mat looks like (yours will not have the text)

Cut all your pieces
Start with the main cage pieces front, back and both sides
At the top where all the score lines are this is a boxed section to add strength to the design once built.
From the top it folds down inwards to make the box section, so fold them all down and glue them in place, using the glue tab, now you will have what looks like a boxed beam along all the main sections of the cage.

Now glue the 4 sides together making the main cage.


Now to start the lower curved roof section
it's easier it you put a gentle curve into all the curved roof sections so that they glue together easier
Have your 4 lower curved roof sections ready, there's glue tabs on the side sections to attach to the front and back sections. 
So go ahead and glue the sides to the front and then glue the back in place. Be patient, it's a little bit fiddly,  but it does go together with a curve in it.
Now you will have the 2 sides of the lower roof section all glued together.

Do exactly the same with the upper curved roof section

Time to glue the lower curved roof section to the main cage
Using the glue tabs on the roof section glue them to the boxed beam section on the main cage.

leave a little while to dry. 

Now to glue the upper curved roof section to the lower curved roof section, first of all fold the glue tabs outwards
Take the upper curved roof section through the bottom of the main cage it's easir to go through the bottom of the cage than the top, the glue tabs will stop it coming out the top so now dab some glue on these tabs and secure in place to the lower roof section.
Now glue in the tiop and the base of the cage and then finally the overlays for the front and back of the main cage

There are some extra little decorations for you to use. or add your own :)

Have fun and please pop over to our Facebook page and like us
at My SVG HUT
Thank you :) xx


Tuesday, 16 June 2015

Square Gift Boxes
Purchase this design HERE


I wanted to design a little gift box that was quite strong. 
So I came up with the idea of a double walled box, which gives it plenty of strength. 
It's 4" x 4" x 2" and will easily hold 4 Ferraro Roche individual Chocolates

It's a cute little box and will make a little gift even more special 


Monday, 15 June 2015

Wine Bottle Gift Box
Assembly Instructions

You can purchase this file HERE


Your digital mat will look like this (but without the text)
Please note...
There is now a second inner section for the bottle to sit in which has a wider hole for wider bottles, so there is now a choice, it is not in this image, but it will be on your digital mat.

Dimensions of this bottle box are
4" x 4" x 13.25" high (a standard bottle of wine in the UK is approx 12")
Cut all your parts and lay them out so you now which are which

Start with the base
Glue the 4 sides together first, then add the hinge, (put a fold in the hinge where the dotted lines are to help with the opening of the lid later) the largest end attaches to the base on the tallest side and inside the box, line the dotted lines up to about 2 mm above the edge of the box

Now you can attach the inner section for the bottle to sit in.
Fold all the tabs downwards ( the pointy parts on the tabs are to go to the front of the box)
You will see some little cut lines on both side tabs next to the crease lines, these are for lining up to the edge of the box so that about 1cm is above the edge of the box.

Apply  glue (or sticky tape) to the tabs and glue it in place using those cut lines to guide you to lining it up to the edge of the box.
Glue in the bottom of the base (the square section with 4 tabs)
Place to one side to dry

The lid

Make as the base, 
Glue the 4 sides together first.
 Now glue the inside lining to the top of the lid (the square section with tabs on each side, remember to glue it to the inside of this piece as it's the decorative lining), then  glue this into the top of the lid section (tabs on inside of lid)
Once this is done you can then add the front and 2 sides of the inner lining, the back has to be done when the lid is glued to the hinge on the base.

Now glue the hinge to the lid of the box again leaving about 2mm above the dotted line to the edge of the lid

Lay flat and add your decorative panels to all the sides and the top and bottom.

The Bow


I have designed the bow to wrap around the box and hold the lid down.
The main part of the bow is in 2 pieces and has slots cut into the ends.
the slots are for the ends to slot together around the back of the box.

Glue the narrow ends together making sure that you have one piece with the slot going up and the other piece with the slot going down (it will need to be 4" from each set of dotted lines closet to the narrowing of the ribbon, as this part is for the bow and goes to the front of the box)
Then make your bows and attach them to that ribbon piece. so that you have what should resemble a ribbon with a bow in the middle
Fold it at the crease lines and slot the ribbon ends together 
Now it should just slot over the top and slide down the box to hold the lid closed.

Add your bottle of wine!!


*****One thing to note*****

When the wine is in the box and you close the lid, the lid does slide over the top of the bottle (touching it) this is the way the design is, it's fine and will not damage the box in anyway. So just gently push it down over the bottle and it will close :)


Friday, 5 June 2015

Turning Ferris Wheel

Instructions
Purchase this design here


These are the parts for the wheel

I recommend that you layer the sides, base and the frame with at least 3 layers of heavy card stock this will help keep it sturdy

I used 300gsm card stock and put 3 layers on each side of the wheel, each side of the stand and also the base.

I also made 3 layes for the turning handle too.

So cut all of your pieces and start with making the 8 baskets, the 2 sides and the center pieces , glue on side to the centre piece and then the other amd leave to one side for now
No it's time for the layering of the wheel, layer 1 at a time set it aside under something flat and heavy to help it keep perfectly flat, do this with all the parts that need layering and then do the same again for the second and 3d layers and any more layers that you choose to add.


Whilst they are drying you can build the spindle, this is the piece that the wheel rotates around, it goes through the centre hole of the wheels.
It's basically a hexagon tube, so just fold it around and glue the tab to the other end to gie a boxed section tube.

On one end glue one of the circle shaped discs ( one without the segments cut into it) glue it over one end of the spindle, using the little tabs on the end of the spidle, the will fold outwards for this.

When your layered parts are all dry you can continue but wait until they are 100% dry before building with them.

Take one of the frame side sections and put it over the spindle and push it up to the end disc you glued on earlier.
Then take a disc that has the segment section cut into it and put it onto the spindle up against the frame make sure the glue tabs (segments) on the disc are folded out and pointing inwards away from the frame it's going up to. Make sure there is some room for the stand in between both discs, just enough to allow it the spindle to rotate without restriction of the discs,  the tabs can now be glued in place to keep

You will need 2 more of the discs with the segments cut into them, these glue to the outer side of each wheel with the glue tabs (segments) pointing outwards away from the wheel.

Once you have glued on the disc on the wheel slot one wheel over the spindle with the disc on the outside edge, this pushes up to the other disc on ther and the tabs over lap and can be glued down

slot over the other side of the wheel keeping the disc to the outside again. you will need to add your baskets at this stage
Make sure you can line up the wheels on each side so that they are symmetrical then 
Slot one side of the holder into one of the holes (circles), then slide the basket onto the holder then pop the holder through the hole on the other side
, do this with all 8 baskets,

Once all the baskets are in place you can now see the gap you need on the spindle for the otherside of the wheel and it can be glued in place onto the spindle.
Now put on the another disc with the segments cut into it, slot it over and let the tabs overlap again. and glue them down

Put the frame onto the spindle, and then slot the turning handle onto the spindle, with the glue tabs inwards, push the handle along until the tabs touch the back of the other disc that's on there already. glue in place making sure the spindle is free to turn.

Then glue the last plain disc on the end of the spindle to finish that off.

On the frame divide the tabs so that 2 go one way and one goes the other, I'm not sure if it matters which side has the most tabs

Then glue one side onto the base keeping the tab level with the longest edge of the base (this is the correct width for the frame) glue both tabs down on either side of this frame. then do the same with the otherside of the frame keeping the tab to the edge of the base for the correct width

The last thing to add is the knob for the turning handle, and the treats.

I'm currently looking at some side supports for this file to add extra stability to the whole thing

As soon as they are available I will let you know and those who have purchased the file can have the supports emailed to them :)

I hope this helps and makes some sense

have fun!


Tuesday, 2 June 2015

Cupcake wrappers
Visit the shop here

Afternoon tea cupcake wrappers


Flowers Cupcake wrappers


Spiders web Cupcake wrappers


Cupcake Stand Single cake
teapot design
Assembly Instructions

Purchase this design here 


 Pretty little cake stand for a single cake


Your digital mat layout wll look like this
Out of 180gsm cardstock
Cut 2 each of
Top of lid
Teapot section 1
Teapot section 2
 and 1 of the wrapper
having 2 layers adds strength to your cupcake stand


Then out of decorative paper
cut 2 each of
Teapot section 1 (you will need to flip the second cut of this one)
Teapot section 2 (you will need to flip the second cut of this one)
and 1 of
Teapot top


Glue the 2 section 1's of cardstock  together
and the same for both section 2's
 then glue the decorative paper to each side of both these sections so that both sides of each section have decorative paper

Now glue the tops together then glue the decorative paper to one side of this

 When completely dry
Slot sections 1 and 2 together 
and then put the top on with the decorative paper facing upwards,
it just slots over the cross section of the teapot to give a base for your cupcake and holds the stand in place